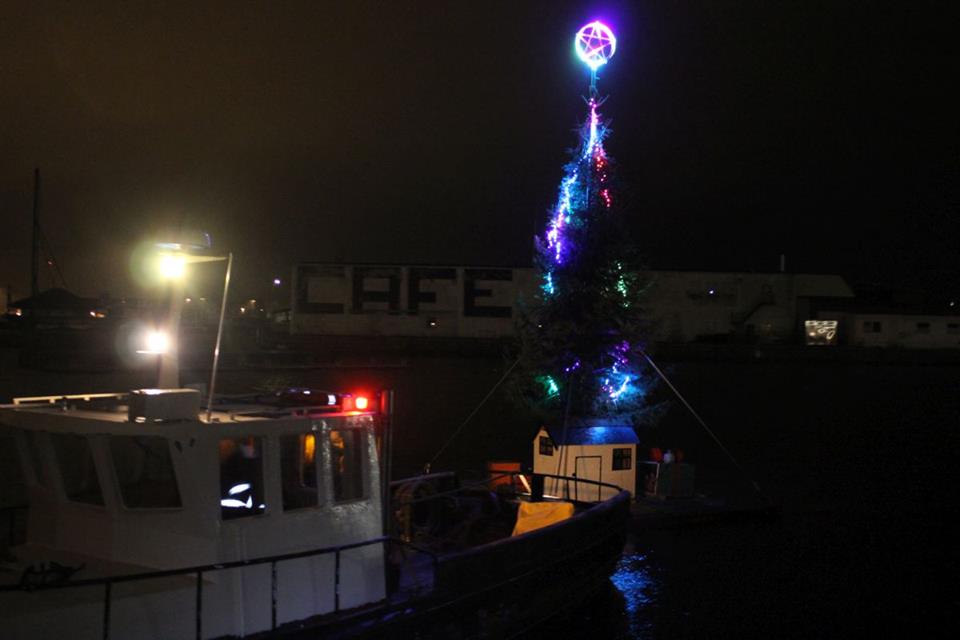
If you’ve been around the harbour in Copenhagen during december you may have noticed an anchored barge with a huge christmas tree full of colored blinking lights.
If not here’s a video.
The sailing yule tree – Video pattern test in Teglværkshavnen from Christian Liljedahl on Vimeo.
During the month of december it will be towed around and anchored up in different places around the harbour.
This is the story of how we made a stable barge, got a christmas tree on it, got more than 200o individually controlled RGB LED’s up and running, and how we managed power to the whole contraption.
Let’s get started.
For a christmas tree to be spectacular when it is on a barge in the water it needs to be a certain size. If it’s too small it just won’t look good when viewed from afar. We estimated that it needed to be around 10 meters high to be impressive. This gives rise to some structural thoughts. Denmark is prone to some pretty decent december storms, and the christmas tree needs to be able to survive these. When designing the barge, and the attachment of the tree we needed to take this into consideration, especially since a huge christmas tree on a barge acts as a giant sail that will blow the whole thing over or rip it apart if not constructed correctly.
There were 2 main considerations;
- attachment of the christmas tree to the barge needed to be robust.
- The barge needed to be heavy and wide enough that a storm wouldn’t tip the whole thing over.

Real professionals do their wind calculations by hand!
After a whole lot of discussion and a few structural calculations it was agreed that a 5×5 meter wooden barge with a welded steel perimeter and structural members to the holder for the tree in the middle was the way to go. Our calculations showed that a 5×5 meter barge would start to run into trouble at windspeeds of around 40 m/sek. Hurricane speed is 33 m/sek so we agreed that this was well within safety limits.
So we got to work constructing the barge.
Since a 5×5 meter barge is pretty hard to handle due to its size and weight we decided to make 3 barges, join them in the water, and then weld the steel perimeter around them to keep them together.
First, here’s a construction drawing of the whole barge. As you can see in the picture the wooden barges are enclosed by a sturdy welded steel frame, that has extensions to the middle where the Christmas tree is placed in a steel cylinder made out of an old gas canister. With proper welding the tree will break before the construction.

This is what we’re building!
Here are a few construction pics that show how the barge was made.
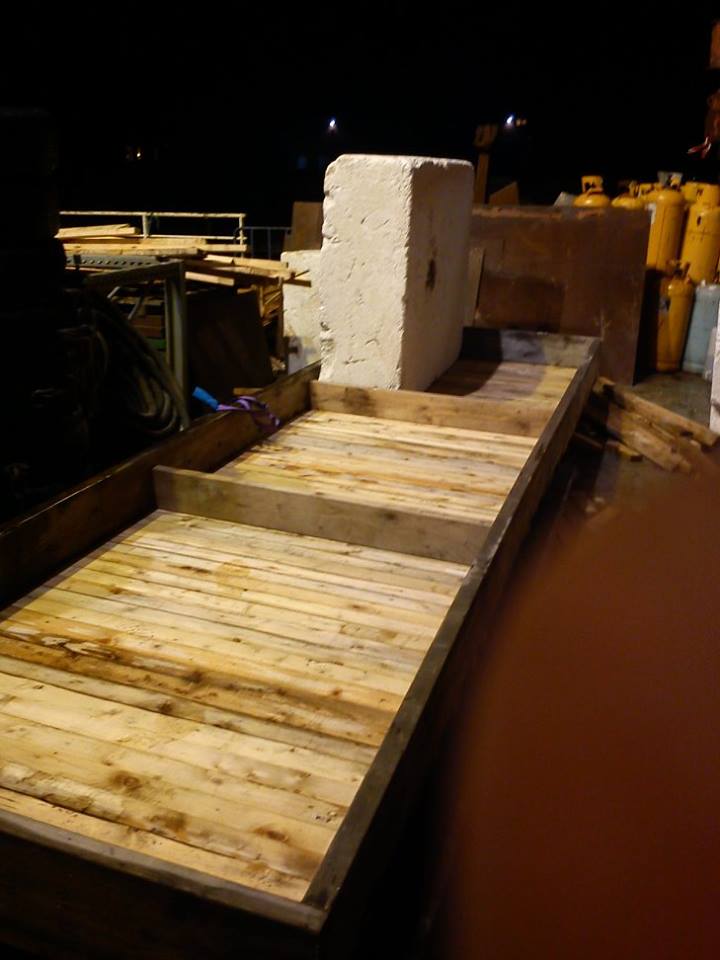
First step is to make an upside down frame with space for polystyrene blocks that will act as buoyancy.
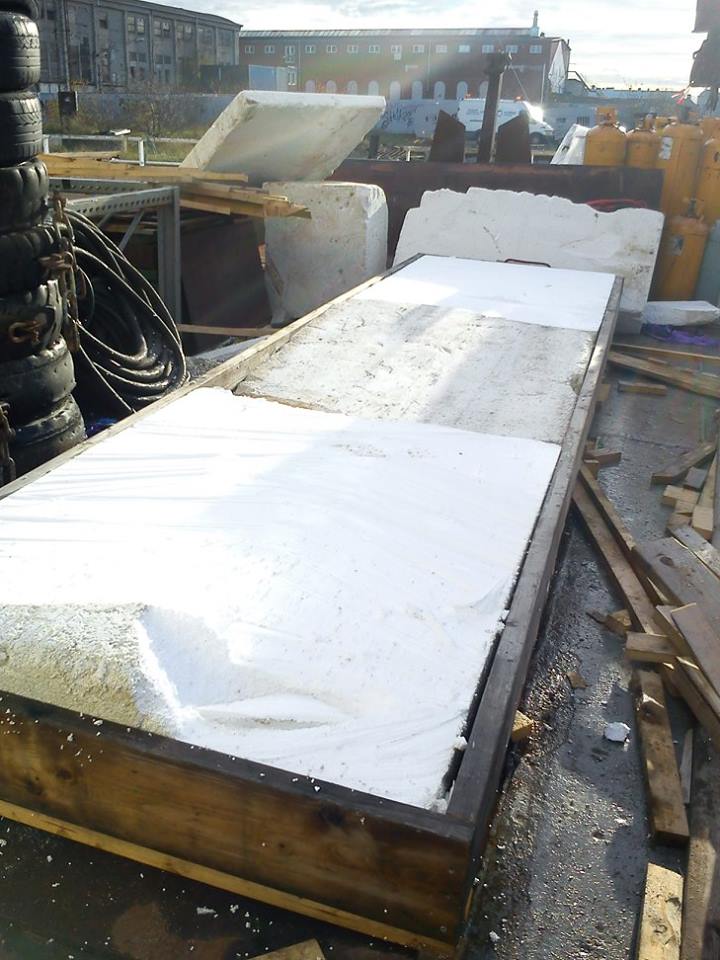
Second step is to put the polystyrene blocks in between the wooden frame. Since they will be under the barge pushing upwards they don’t need to be secured very well. All that’s holding them is a few long screws through the wooden sides.
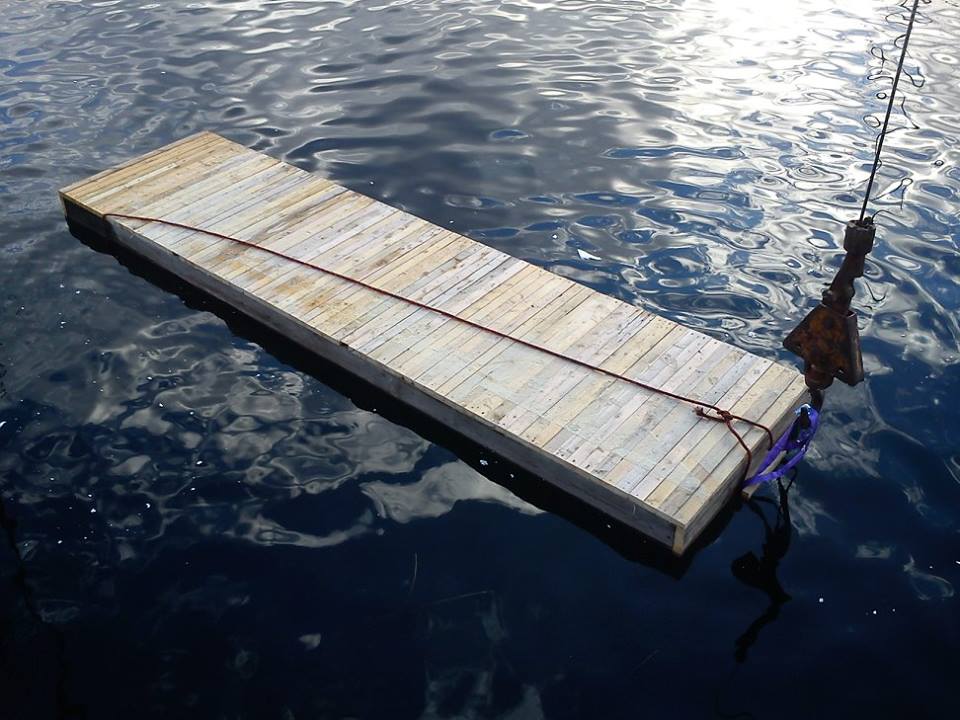
Third step is to turn it around and lower it into the water with the crane that we luckily have. (cranes are fun!)
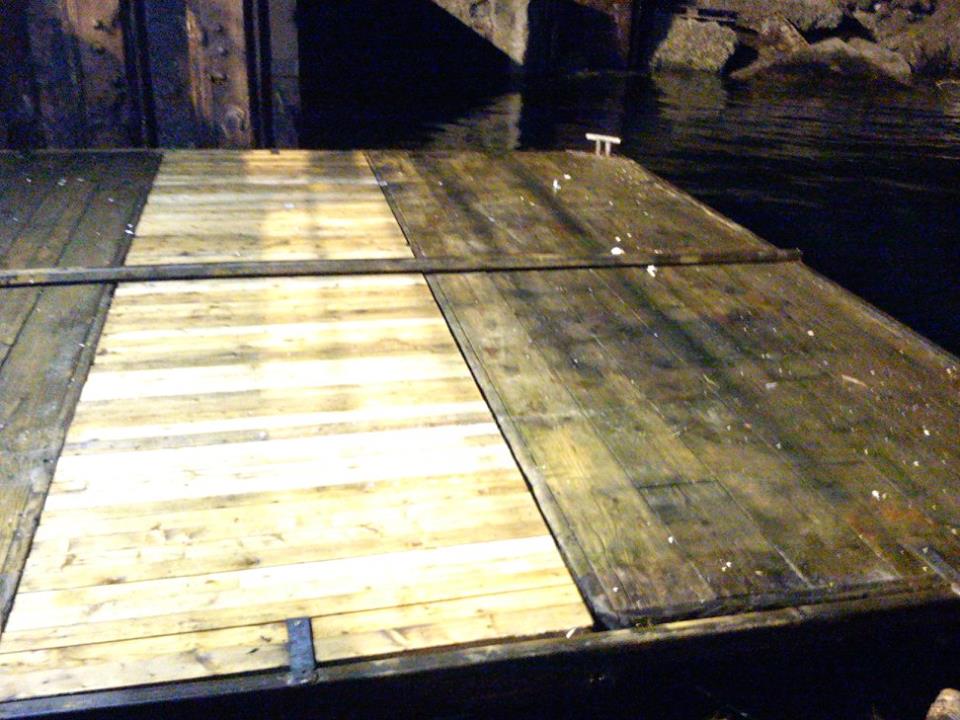
Thirds step is to weld the frame. Notice that we welded a bollard in each corner for towing, anchoring and mooring.
Here’s a short video of the barge with the tree on it. We mounted the LED chains and the star by holding the tree in the crane and hoisting it up and down while doing the decoration. That way one man could stand in one place and decorate the whole tree, while another was operating the crane. Much safer and much more enjoyable.
Notice the little house? That’s the control room. We’ll get to that later.
Now for the fun part: Blinking lights! Lots of them!
For the tree we used 12 RGB LED chains with the WS2811 controller built into each LED. That makes them individually addressable through a shared bus, which of course makes the whole thing much more interesting.
As you can see in the drawing below each of the 12 chains turns around the tree as they hang from the top to the bottom. This setup gives us better creative control than just having them hang straight down, and it also “fills out” the space better and allows for cooler effects.

Sketch of LEDs on ther tree
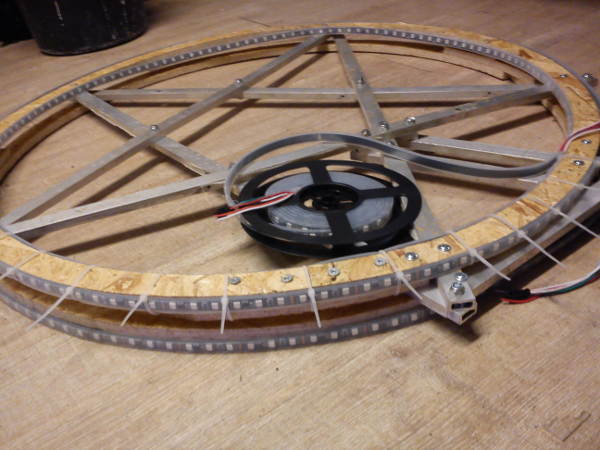
The star above the tree was made in a similar fashion, but had its own bus. It has a LED chain on each side of the star, 2 chains on the outer rim of the enclosing circle, and 2 chains on the inner rim of the circle. The star is made out of CNC cut plywood and some spare aluminium we had lying around. Notice that with the rim around the edges we can both make a star, a half-moon and an anarchist sign 🙂
In the picture below the LED chains are being mounted.
Since we end up running quite a lot of amperage through the cables for the LED’s there’s a power distribution block with 12 gauge bus wiring and 10A fuses for each group of 200 LEDs forming one ~12 meter long chain with a nominal maximum draw of 8.2 amps (~100 watts). The +DC side is split in two so two car batteries can split the load between them. A sturdy steel ground bus bar is included for the DC minus side.
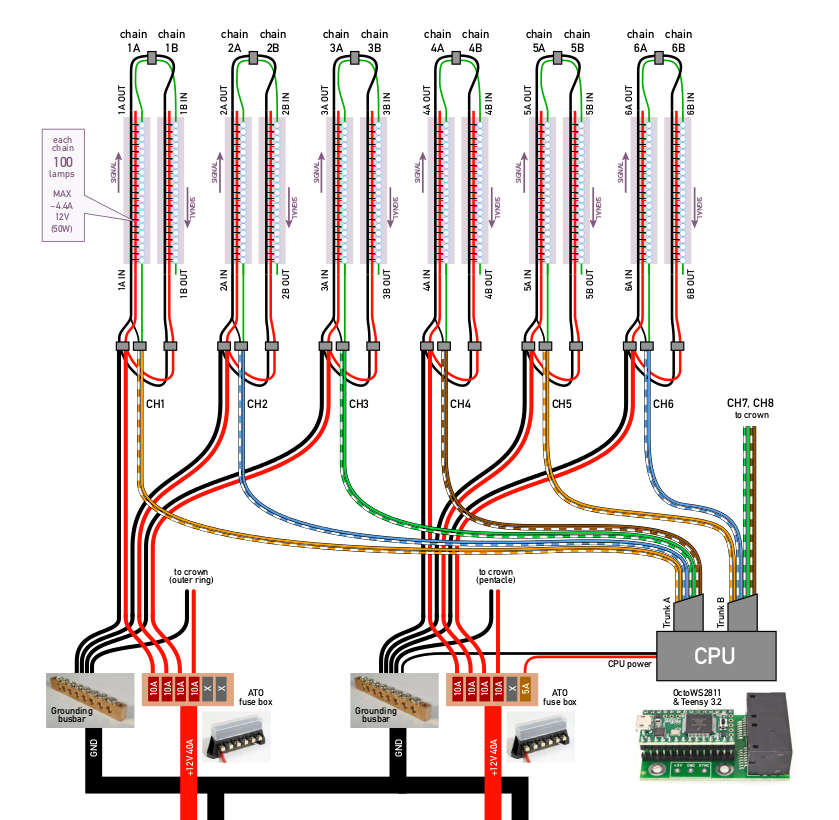
The controller that rund this whole bandoogle is a PJRC Teensy 3.2, an OctoWS2811 8-channel LED driver and a connected PC with some custom software. Also a power converter with a handy battery voltage display.
Here’s a a picture of a test assembly.
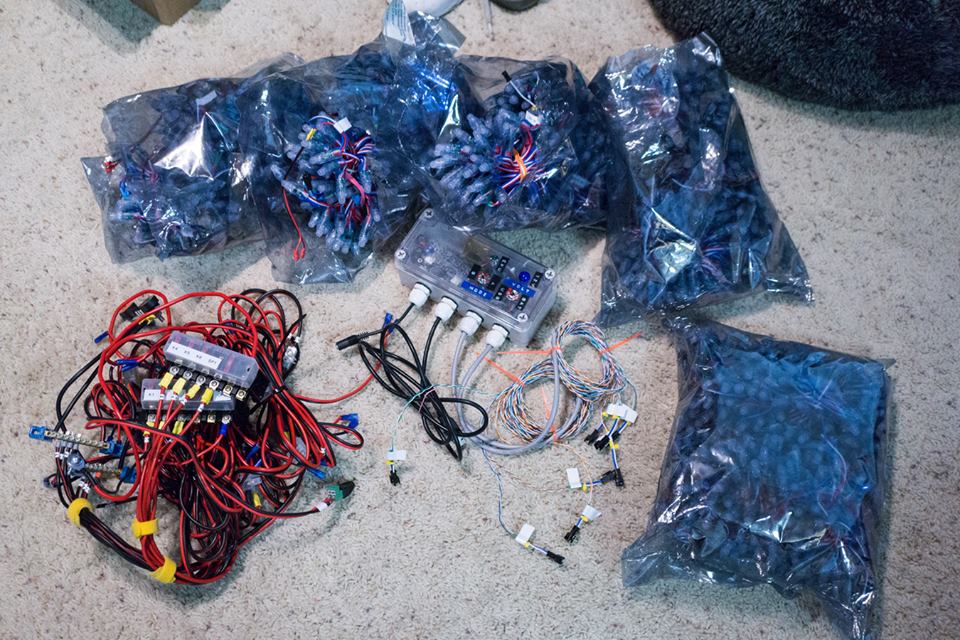
Testing the setup of wiring and LED’s.
The system includes wiring for 6 groups for a total of 1200 LEDs. The Teensy has a superfast USB serial port that isn’t constrained by the usual 115 kbit limit and can sustain throughput for up to 12 megabits/sec with very little CPU load on the Teensy’s ARM, which also has a nice DMA mode used by the OctoWS2811 output system to produce WS LED signals with zero CPU load. That makes it practical to stream 60fps video to the 1200 pixels on the Teensy from a host PC as well as running embedded pattern code.
Streaming video you say? To a christmas tree? But how? And why?
Well, think about it for a moment; How do you make nice patterns with 2000 LED’s? Which interface do you use? If you have to address each LED individually by flipping a switch your nice pattern will be ready for christmas in 2 years. Maybe. If you haven’t gone mad from switch-flipping before that.
So what is the ideal interface for controlling a lot of RGB pixels. Video, obviously.
So we made a nice christmastree-controller program for a PC that allowed us to control the patterns on the tree with video clips. The software basically takes a videoclip of your choosing and projects it onto the tree, wrapping it around the circumference. The star has its own video so it can be controlled individually.
Here’s a video of the sottware. It includes a christmastre emulator so you can see how the pattern will look on the tree.
Remember the little house on the barge? The nice christmas-y one with little windows? That’s the control room where the electronics will be mounted, shielded from the weather.
Many years of experience with crazy projects and Murphy’s law dictates that it is inevitable that a lot of hours will be spent on the barge programming, debugging and tuning the tree. That’s fine and to be expected, but not so fine if it has to be done outside in the rain in the middle of a windy harbour.
So a control room was built exactly big enough to house a table and a chair where you can sit inside away from the elements. There’s a small door you can climb through, and one side of the roof is hinged for easy access.
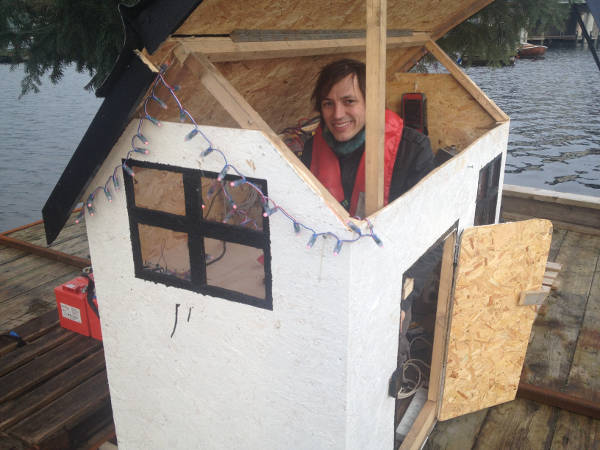
The most christmas-y control room in Copenhagen. Just large enough for one person to sit inside and work, but no larger.
The control room also holds the wiring and electronics needed for running the lights.
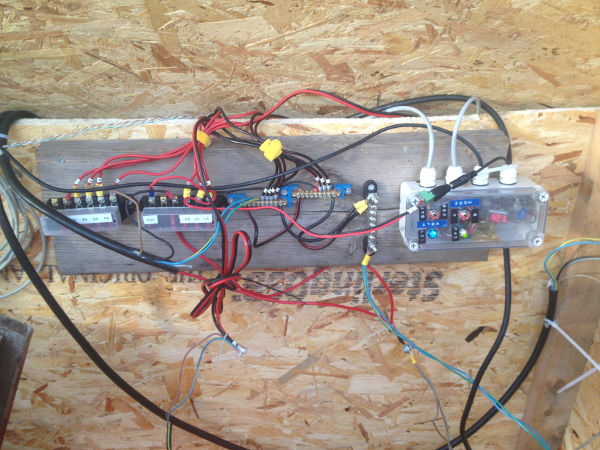
Fuseboxes, grunding bars and control box. Note the neat professional wiring. Well…
How about power? All these blinking lights draw a lot of power, and a barge in the middle of the water isn’t exactly the place where you’ll find a wall socket with all the electricity you need. You’ve got to bring your own power. Damn…
On the barge is a battery bank of a few large 12 volt car batteries that can run the lights and electronics. If all the lights are run full-on this will drain the batteries in a few hours, but with well-chosen patterns that only light up parts of the tree we can extend that to almost 2 days. This means that we’ll need to recharge the batteries every now and then.
Did you notice the large blue christmas present with a red ribbon on the barge? No? It’s a nice christmas present that happens to hold a gasoline generator.
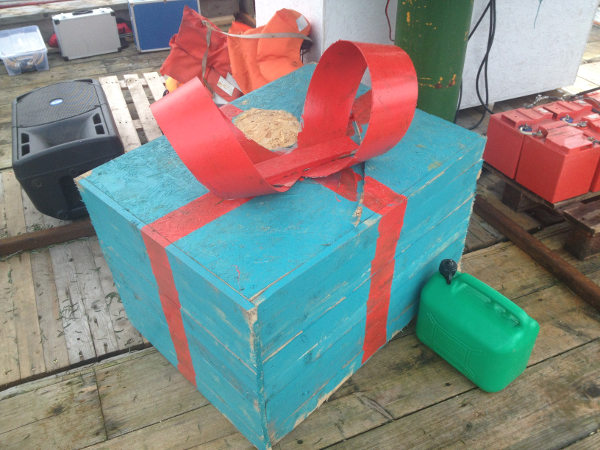
Inside this box is a nice Honda generator. What a nice christmas present…
A battery charger is hooked up to the batteries, so that when you turn on the generator it charges the batteries. Every 2 days we sail to the barge, put gasoline in the generator and start it up. By filling it just enough for 4 hours of running time it will automaticylly stop when it runs out. That way there is no need to stay on the barge to turn it off when the batteries are charged.
Simple solution, except for one small problem. When the batteries are charging the voltage on the batteries spikes to around 14 volts, and the LED’s really don’t like that. They’re designed for 12 volts. Luckily the generator has a beefy 12 volt outlet as well as the 220 volt outlet connected to the charger, so a 220 volt relay flips the power source for the LED’s from the batteries to the generator output. When the generator is started the relay automatically switches from the batteries to the generator output. Simple and effective.
That’s it. Ready for action!
Luckily one of the guys building the christmas tree has a tugboat, so towing the tree around the harbour is easy. Here’s a picture of the first tow.
The friendly Tug Lillebjørn towing the Christmas tree.
The maximum height of boats going through the bridges of the Copenhagen harbour is 5.4 meters, so when towing the tree from one end of the harbour to the other the bridges need to open. One of the design parameters for the Christmas tree might have been that it should be at least 6 meters tall…
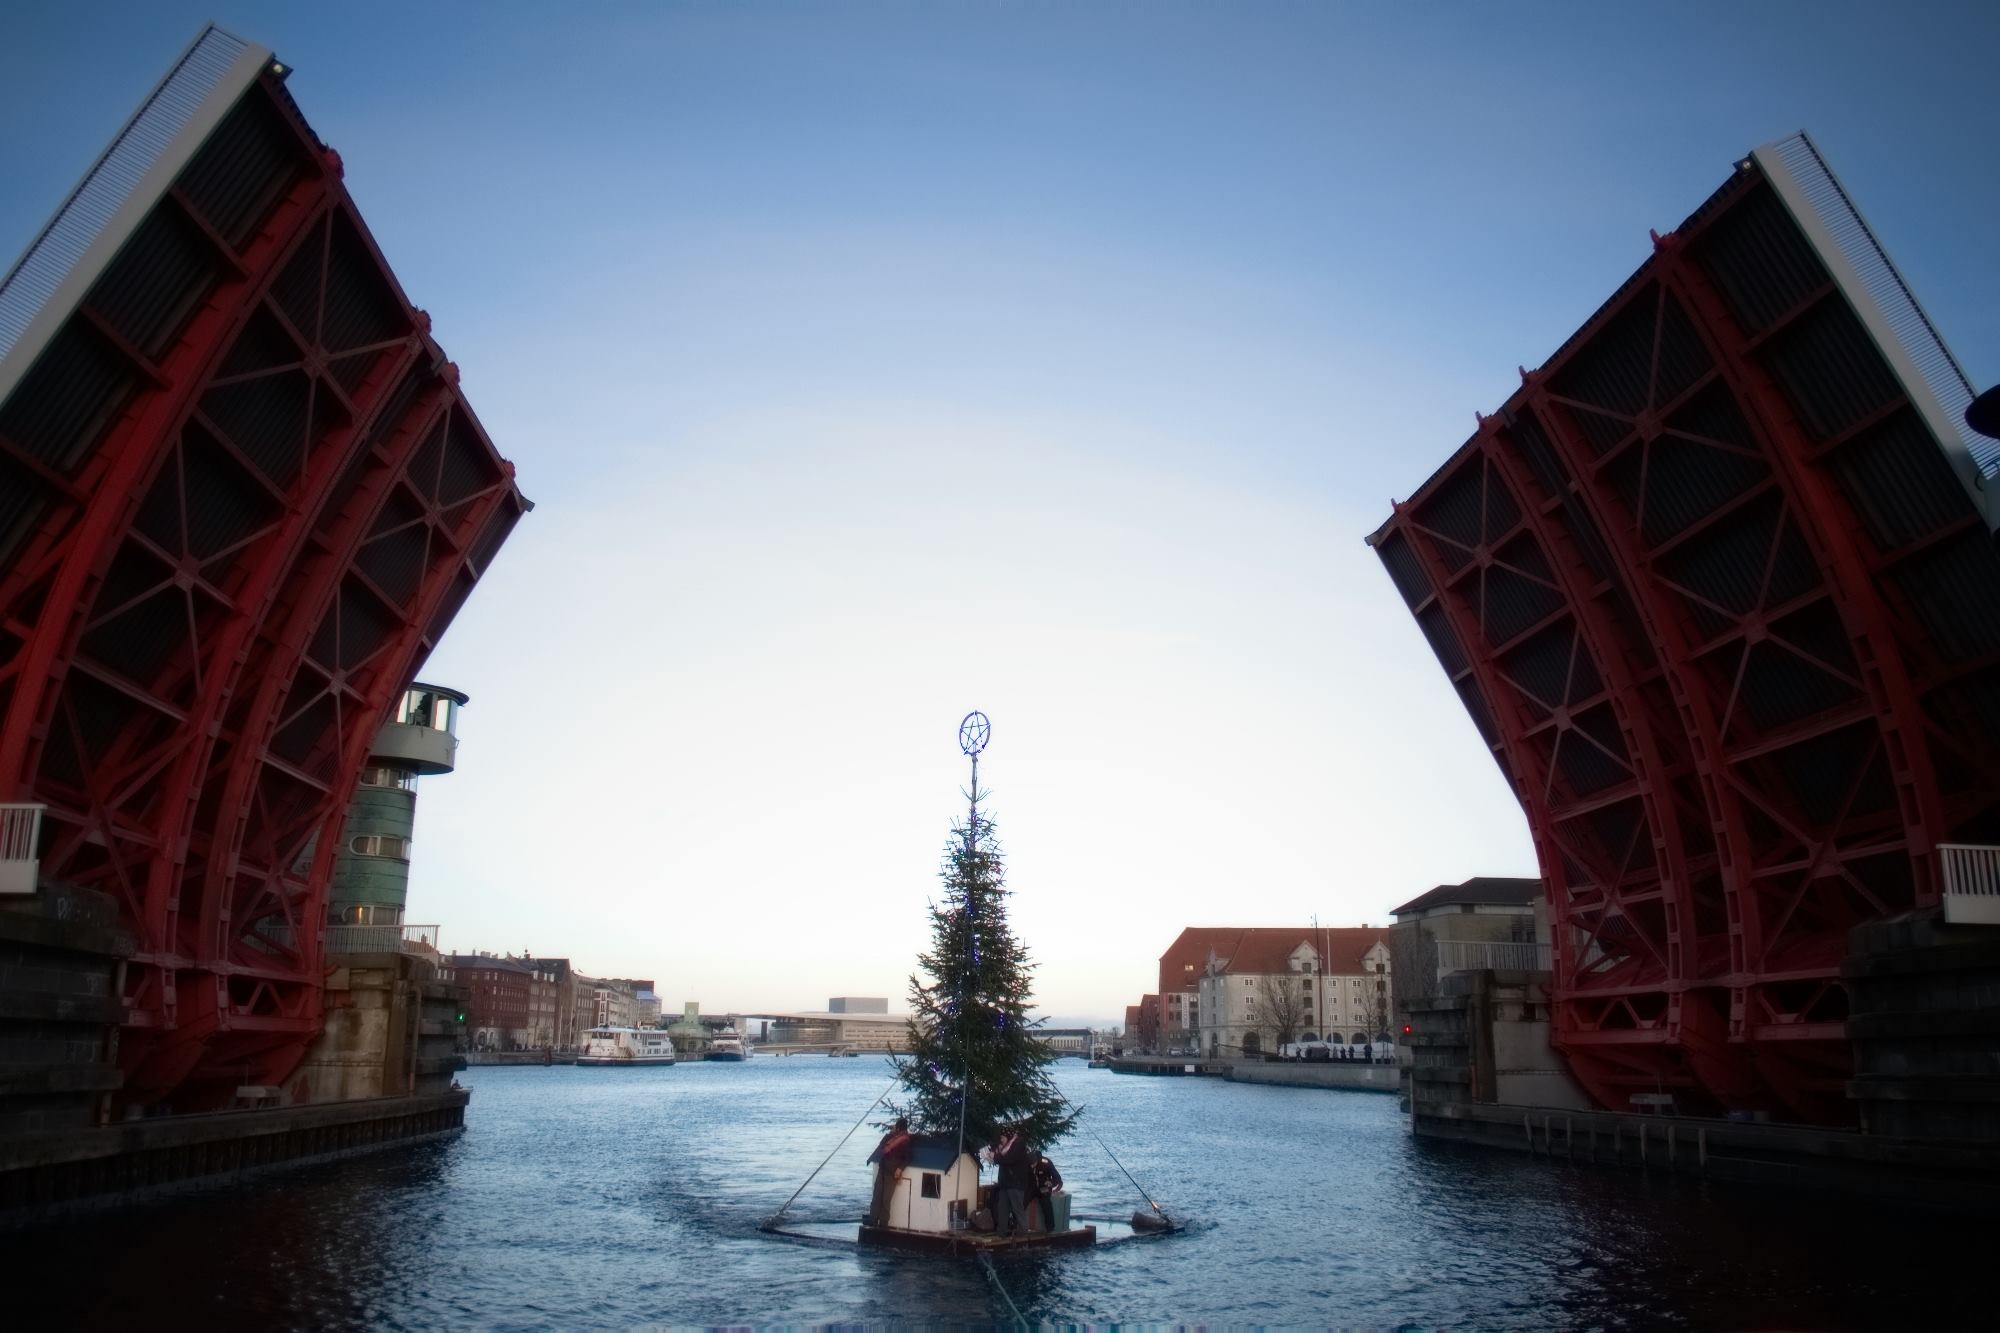
A christmas tree of the right proportions can open all sorts of bridges.
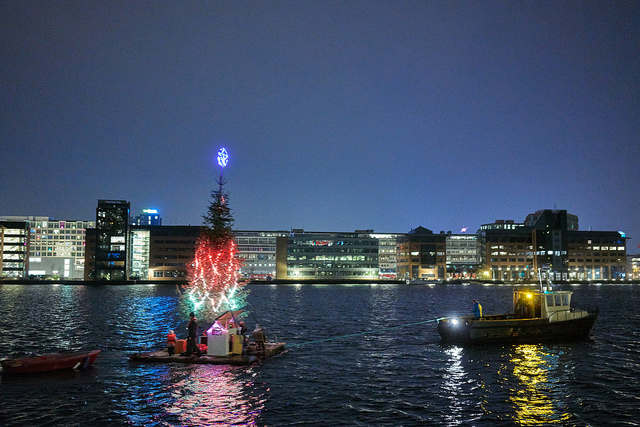
The christmas tree being towed through the harbour to spread love and happines. Thanks to Peter Sloth for the beautiful picture.
That’s all folks. Merry Christmas!

